Introduction
The Advanced Filtering widget serves as an extension for users of Engineering Requirements DOORS Next Generation, providing the ability to create sophisticated and customized filters based on complex criteria. This capability not only enhances user efficiency and data organization but also meets the specific needs of former DOORS Classic users who are accustomed to advanced filtering options.
Deployment of the Widget
The widget is deployed as any other IBM DNG widget. Detailed manual for the deployment is attached to the deployment files, or is also available on Softacus webpage: Enable Widget Extensions in DNG | Softacus
User Interface
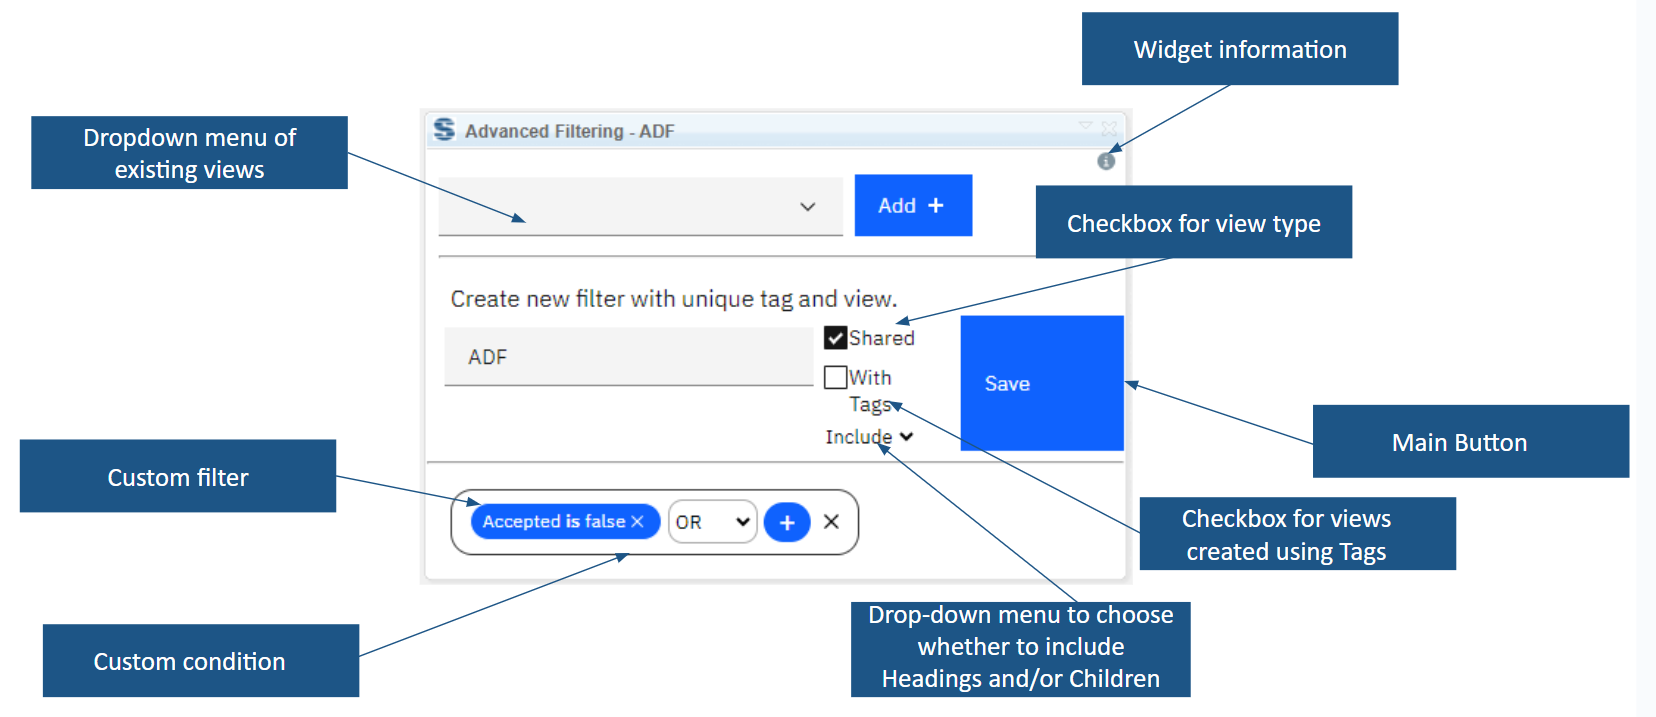
1.) Widget UI
Based on the functionalities and use cases that this extension is helping you with, we kept the user interface as simple as possible. In the current version of the widget you can find:
● Widget information section - section with version, short description and other information about the extension
● Dropdown menu of existing views - all views that have been created using this widget will be displayed in the dropdown menu
● Checkbox for view type - the user can choose whether he wants to create a shared or private view
● Drop-down menu to choose whether to include Headings and/or Children -
● Checkbox for views created using Tags -
● Custom condition - the user can combine several filters using AND/OR conditions within one view
● Custom filter - the widget provides a series of filters that the user knows from DNG
● Main button - after all necessary selections are made this button must be pressed to start an extension
Preconditions
This script is designed to work exclusively within a designated module and selected view. If the user fails to meet these prerequisites, the widget will display an informative message.
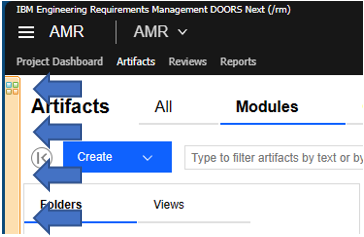
How to Use the Widget
In this sample scenario you will see how the extension is working and how you should use it:
Create View
1. Open the mini dashboard.
2.) Mini dashboard
2. Click the "Add Widget" button.
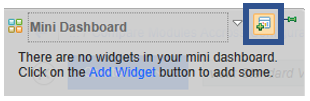
3.) Add Widget button
3. Find Advanced Filtering in your widget catalog.
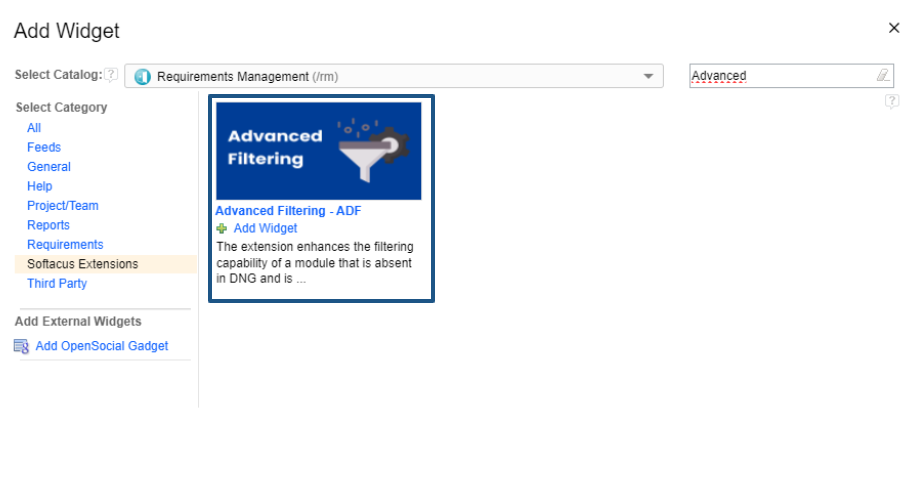
4.) ADF in Widget Catalog
4. Add ADF to your mini dashboard.

5.) ADF to mini dashboard
5. Click on the “Add” button
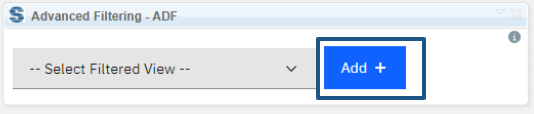
6.) Add views
6. Fill in the name of the creating view
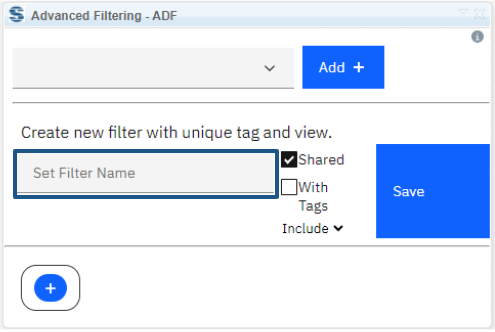
7.) Filter Name
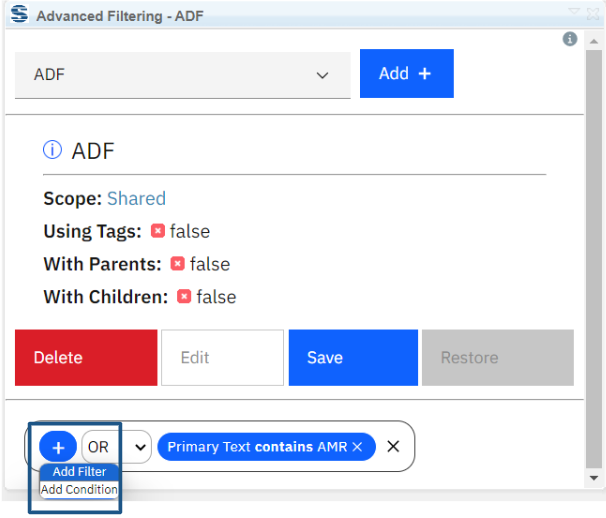
7. Click the + button to add a filter or condition
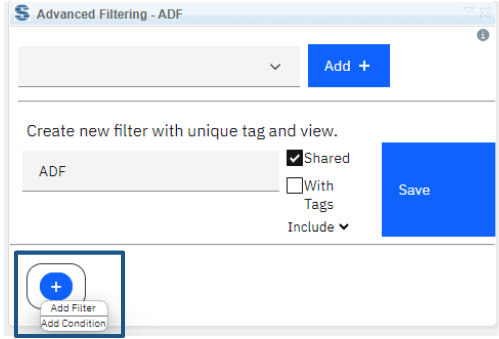
8.) Filters and conditions
8. Choose the type of condition among the filters from the menu
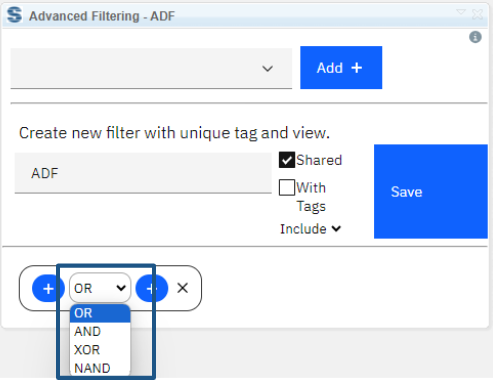
9.) Condition type
9.Choose an attribute from the dropdown
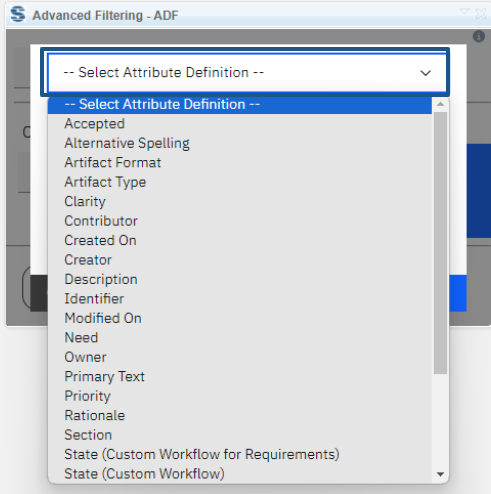
10.) Attribute Definition
10.Choose a type of filter from the dropdown
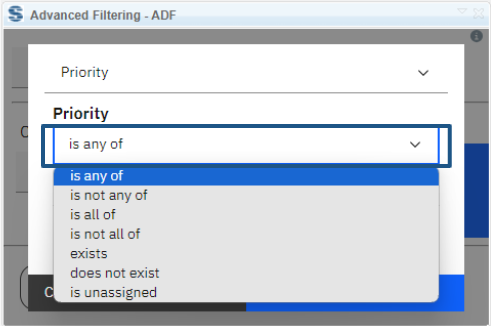
11.) Type of filter
11.Choose a value(s) of filter from the dropdown

12.) Value of attribute
12. Click the Add Filter button
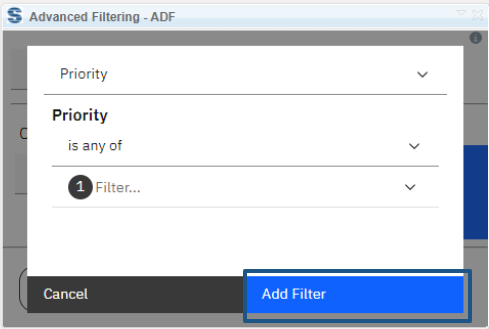
13.) Add filter
13. Uncheck the checkbox if you want to create a personal view. If you want to create a Shared View, leave the checkbox checked
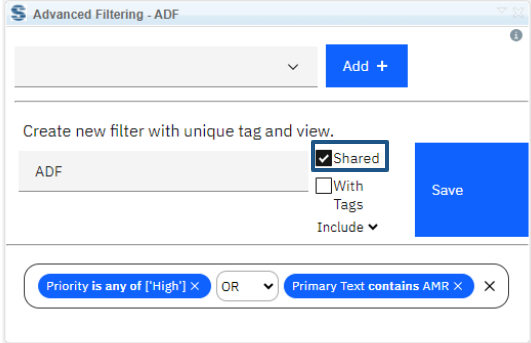
14.) Views
14. If you want the view to be created using Tags, check the checkbox. (Warning: the modified date will be changed when the artifacts are tagged). If you want to create a filter type without Tags, leave the checkbox unchecked (Warning: We do not support generating reports from this view).
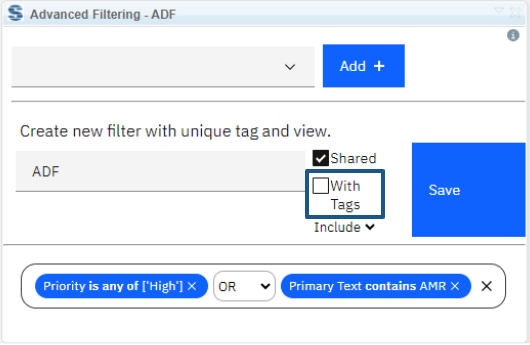
15.) Tags view
15. If you want to include headings and/or children of relevant artifacts in the view, check the checkboxes
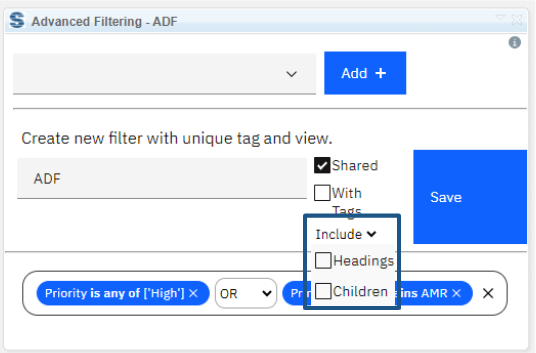
16.) View include
16. Click on the “Save” button
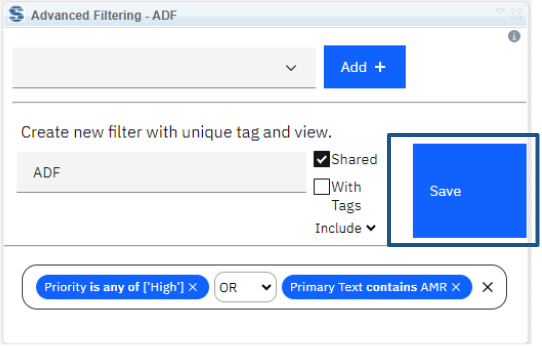
17.) Save View
Edit View
1. Choose from the dropdown from the created views

18.) Select View
2. Click on the Edit button
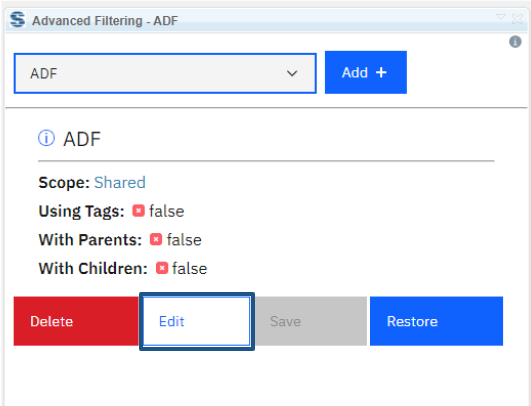
19.) Edit button
3. Click on the “x” button to remove the existing button
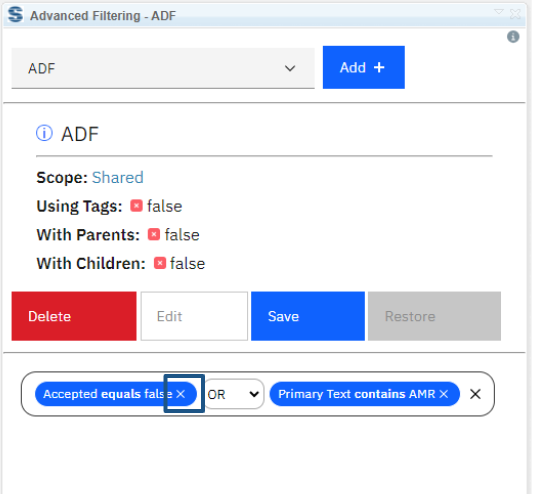
20.) Remove filter
4. Create another Filter or Condition
21.) Create filter or condition
5. Click on the “Save” button
22.) Save edited view
Restore Deleted View
The deleted View from the jazz environment will continue to be registered in the widget. Thanks to this, it is possible to create an accidentally deleted view again with one click
1. Choose the deleted view from the dropdown from the created views
23.) Select View
2. Click on the “Restore” button
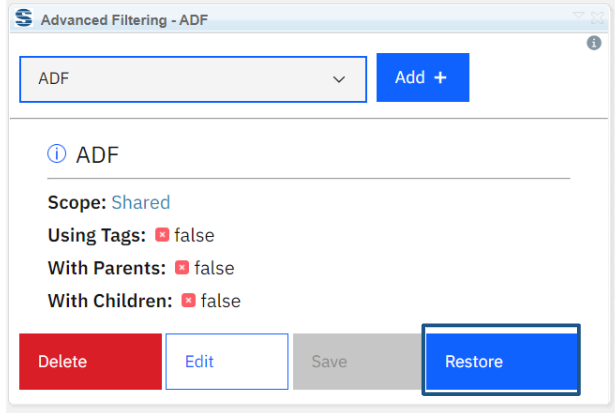
24.) Restore View
Delete View
1. Choose the view from the dropdown from the created views

25.) Select deleted view
2. Click on the “Delete” button
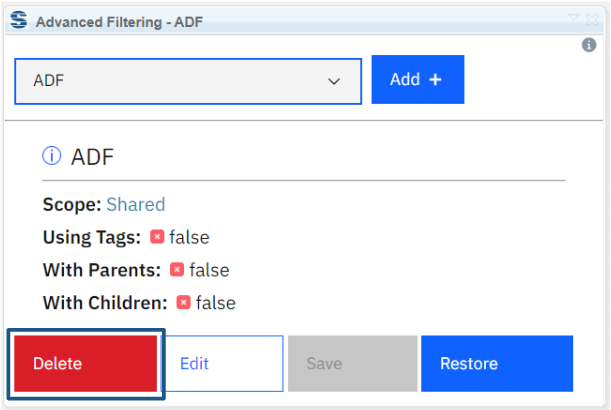
26.) Delete View
Softacus Services
We, in Softacus, are experts when it comes to consulting and service delivery of IBM software products and solutions in your business. We help our clients to improve visibility and transparency when licensing and managing commercial software, providing measurable value while increasing efficiency and accountability and we are providing services in different areas (see Softacus Services).
IBM ELM extensions developed by Softacus are free of charge for the customers who ordered IBM ELM licenses via Softacus or for the customers who ordered any of our services. If you are interested in any of our IBM ELM extensions, you found a bug or you have any enhancement request, please let us know at info@softacus.com.
Related and Referenced Topics
Blog Articles:
Basics of Links and Link Types in IBM DOORS Next Generation - learn the basics about the linking and link types in IBM DOORS Next.
Linking Techniques in IBM DOORS Next - article explaining basic concepts and showing multiple ways of creation of links between artifacts.
Link By Attribute Feature in IBM DOORS Next - the article explains how to use the "Link by attribute" function to automatically create, update, or delete one or more links between artifacts based on values in the attributes of the artifact.
Softacus Widgets:
Link Switcher - widget developed by Softacus, that converts the context of artifacts links in a very short time.
Module Link Statistics - extension that provides users with a quick overview of the amount of the links in specific link types in a module.
Link Type Change- extension developed by Softacus designed to enhance the functionality of DOORS Next Generation by allowing users to manipulate the direction of a link or convert it to another type of link.
Links Builder- extension that allows the users to create a link between two artifacts in DOORS Next Generation according to the certain rules.
Link by Foreign Attribute - this extension allows users to create links between artifacts in the selected module(s), based on the attributes values.
Show Attributes of Linked Artifacts - this extension shows the attributes and links of the artifact that is currently selected.